
1. Wired vs Wireless: Understanding the Fundamental Difference
Most homeowners spend time planning their CCTV, intercom and alarm systems, but give little thought to the network that connects everything together. The reality is that your home network affects every connected device: a poorly planned network leads to slow Wi-Fi, buffering video, unreliable cameras, and frustrating problems that are expensive to fix after the renovation is complete.
If a device does not move, wire it: cables provide dedicated bandwidth that Wi-Fi cannot match for fixed devices such as CCTV recorders, intercoms, and smart TVs. Wi-Fi coverage problems are more common than speed problems: upgrading your internet plan will not fix a dead zone.
Cat 6 is the minimum standard for new installations; Cat 6A is preferred for major renovations where future-proofing matters. A managed PoE switch is the right choice for any home with IP cameras, intercoms, or access control: it powers devices, segments the network, and allows remote management.
The decisions that cost the most to fix are always made before renovation begins: cable routes, network point quantities, and conduit locations. Most homeowners regret installing too few network points. Very few regret installing too many.
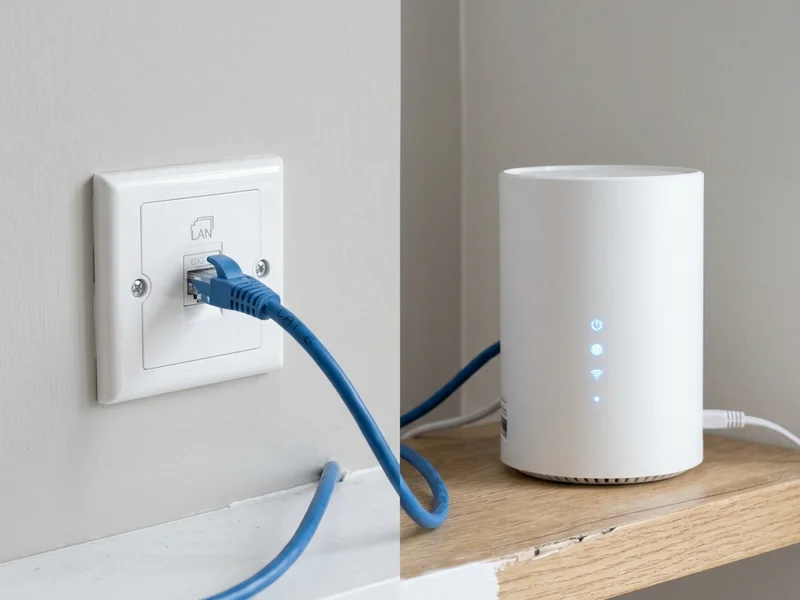
Wired connection: dedicated bandwidth. Wi-Fi: shared bandwidth across all devices simultaneously.
Before making any decisions about your home network, it helps to understand one concept: bandwidth. Think of it like water through a pipe: the wider the pipe, the more water flows at once. In networking, bandwidth is measured in megabits per second (Mbps) or gigabits per second (Gbps). A wired Ethernet connection gives each connected device its own dedicated pipe: typically 1,000 Mbps on a Cat 6 cable: that nothing else competes with. Wi-Fi works differently: all wireless devices share the same radio signal simultaneously. The more devices connected, the more they compete, and the slower the real-world experience becomes.
A Wi-Fi 6 router rated at 1,200 Mbps shares that bandwidth across every connected device simultaneously. A single Cat 6 cable connection gives one device 1,000 Mbps to itself. For fixed devices that never move, wired is almost always the better choice.
How Much Bandwidth Do You Actually Need?
Add up simultaneous users in your household to size your internet plan and internal network correctly:
| Activity | Bandwidth Required | Connection Recommendation |
|---|---|---|
| 4K streaming (Netflix, Disney+) | 25 Mbps per stream | Wired preferred |
| Video call (Zoom, Teams 1080p) | 10–15 Mbps upload and download | Wired preferred |
| Online gaming | 10–30 Mbps, low latency critical | Wired only |
| IP security camera (1080p continuous) | 2–4 Mbps per camera | Wired only |
| General browsing and social media | 5–10 Mbps per user | Wi-Fi acceptable |
| Mobile phone (general use) | 5–15 Mbps | Wi-Fi standard |
A household of five with two people streaming 4K, one on a video call, two browsing, and eight cameras recording locally needs roughly 150–200 Mbps of internal network capacity at peak hours. The ISP speed entering your home is only as useful as your internal network's ability to distribute it.
2. Wi-Fi Generations: 5, 6 and 7 Explained for Homeowners
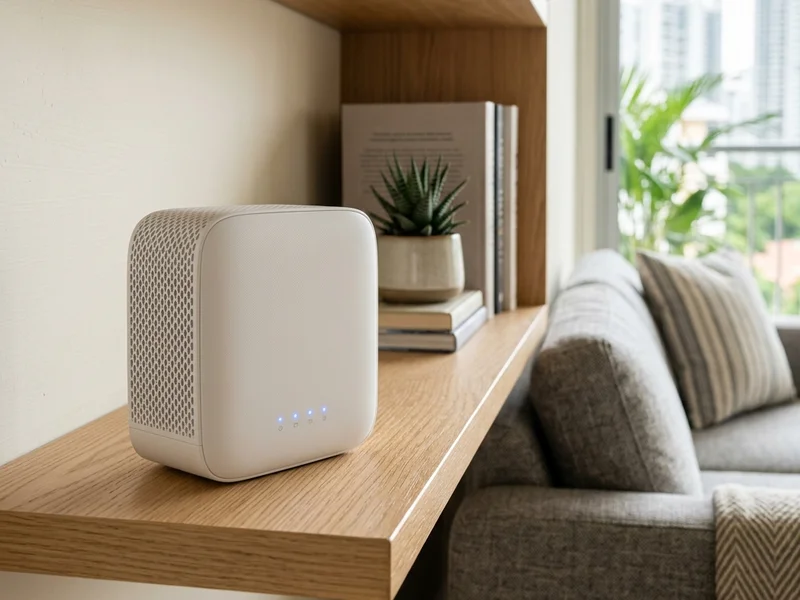
Wi-Fi 6: current mainstream standard for Singapore landed homes.
Most homeowners know they need Wi-Fi, but many are unsure whether they need Wi-Fi 5, Wi-Fi 6, Wi-Fi 6E or Wi-Fi 7. The good news is that for most Singapore landed homes, the decision is simpler than it appears: and coverage is usually a bigger issue than which generation of Wi-Fi you are running.
Many homeowners focus on the Wi-Fi generation because it is easy to compare specifications on a product page. In practice, most performance complaints are not caused by running Wi-Fi 5 instead of Wi-Fi 6. They are caused by poor coverage. A newer router cannot overcome a concrete floor. A faster internet plan cannot eliminate a dead zone. For most landed homes, coverage design: how many access points, where they are positioned, and whether they have wired backhaul: matters far more than the Wi-Fi generation itself.
| Generation | Standard | Max Speed | Singapore Landed Home Verdict |
|---|---|---|---|
| Wi-Fi 5 | 802.11ac | 3.5 Gbps shared | Adequate for under 20 devices with no heavy simultaneous streaming |
| Wi-Fi 6 | 802.11ax | 9.6 Gbps shared | Recommended for all new installations. Handles congestion significantly better |
| Wi-Fi 6E | 802.11ax (6 GHz) | 9.6 Gbps shared | Worthwhile in dense estates with many competing neighbours on 5 GHz |
| Wi-Fi 7 | 802.11be | 40+ Gbps shared | Unnecessary for residential use today. Revisit in 2–3 years |
Upgrading from Wi-Fi 5 to Wi-Fi 6 makes a noticeable difference if you have more than 15 connected devices. If you have fewer than 10 devices and no specific performance complaint, the issue is more probably coverage (dead zones) or your internal cabling: not the router generation.
3. When to Run a Cable: Smart TVs, Gaming, and Fixed Devices
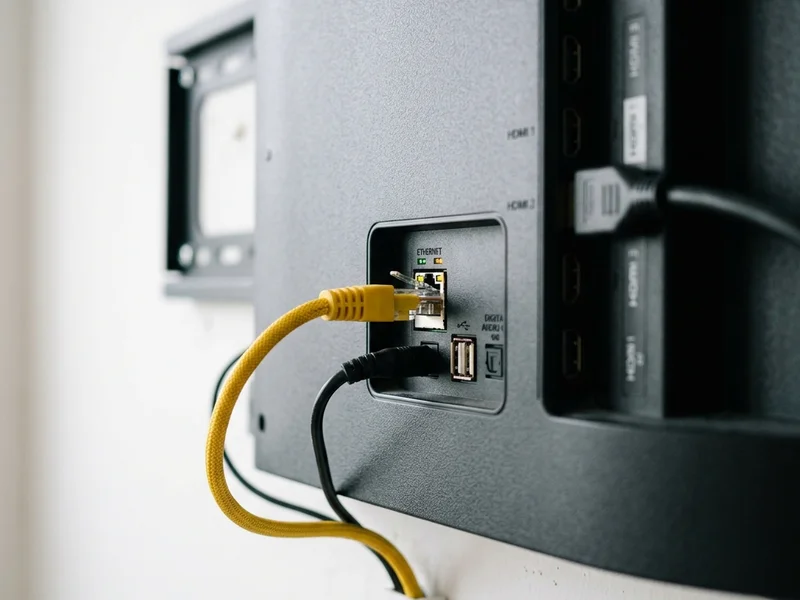
Most smart TVs have an Ethernet port: one cable eliminates buffering permanently.
A simple rule applies throughout this guide: if a device does not move, wire it. While Wi-Fi is extremely convenient for phones, tablets and laptops, a cable remains the most reliable connection available for any device that stays in one place.
The devices in a Singapore landed home that benefit most from a wired connection:
- Smart TVs and media streamers: 4K streaming requires sustained bandwidth. A wired connection eliminates buffering caused by Wi-Fi congestion entirely.
- Desktop computers and workstations: higher throughput, lower latency, no dropped connections during large uploads or video calls.
- Network Video Recorders (NVRs): your CCTV system writes continuous data from multiple cameras. An NVR on Wi-Fi is an unnecessary risk. Wire it.
- Gaming consoles: online gaming is highly sensitive to latency. Wired connections consistently deliver lower ping than even the strongest Wi-Fi signal.
- IP intercoms and access control panels: life-safety devices. Wired connections are more reliable and less susceptible to radio interference.
The reality in most Singapore landed homes is that mobile phones and laptops account for the majority of connected devices, and these are inherently wireless. Wi-Fi is the right tool for mobile devices. The mistake is using Wi-Fi for fixed devices simply because running a cable seems like more effort during renovation. That effort, invested once, eliminates an entire category of network problems permanently.
How Many Network Points Should You Install?
One of the most consistent mistakes during renovation is installing too few network points. Most homeowners focus on current needs and underestimate future requirements. The table below provides a recommended minimum: and in most cases, installing one or two additional points per location costs very little during renovation but is expensive to add afterwards.
| Location | Recommended Minimum Points | Reason |
|---|---|---|
| TV console | 2–4 | Smart TV, streaming device, soundbar, game console: all benefit from wired connections |
| Study room | 2–4 | Computer, printer, IP phone, and a spare for future equipment |
| Bedroom | 2 | One for the TV or computer, one spare for future use |
| Wi-Fi access point position | 1 per access point | Wired backhaul for each access point provides significantly better performance |
| CCTV camera position | 1 per camera | Every IP camera should be wired: never connect cameras via Wi-Fi |
| Intercom indoor monitor | 1 per monitor | PoE-powered monitors require a dedicated network point |
| Home automation controller | 1 | Wired connection provides more reliable operation than Wi-Fi |
Most homeowners regret installing too few network points. Very few regret installing too many. If budget permits, install additional points and leave room for future expansion: the cost difference between adequate and generous during renovation is small, and the cost of retrofitting later is not.
Decide Where Equipment Will Go Before You Run the Cables
One of the most common renovation mistakes is planning the cable routes before deciding where the equipment will actually be installed. The result is often a technically functional installation that creates unnecessary compromises that could have been avoided with thirty minutes of additional thought at the design stage.
A television ends up mounted on one wall while the network points are on another, requiring a visible cable bridge. The CCTV recorder is installed inside a cabinet with poor ventilation because nobody thought about airflow. A Wi-Fi access point is hidden behind carpentry or a decorative panel because the cable emerged in the wrong place. The intercom indoor monitor is positioned where afternoon sun makes the screen unreadable for half the day. The communications cabinet is placed in a location that is difficult to access for maintenance because the space looked available at the time.
None of these problems are difficult to avoid. They simply require the decisions to be made in the right order. Before any cable is pulled, decide where the equipment will ultimately be located and how it will actually be used day to day. Then plan the cable routes to serve those positions. A few minutes of planning during the design stage can prevent years of inconvenience: and potentially significant remedial cost: later.
4. Wi-Fi Extenders, Mesh Systems and Access Points: What They Can and Cannot Do
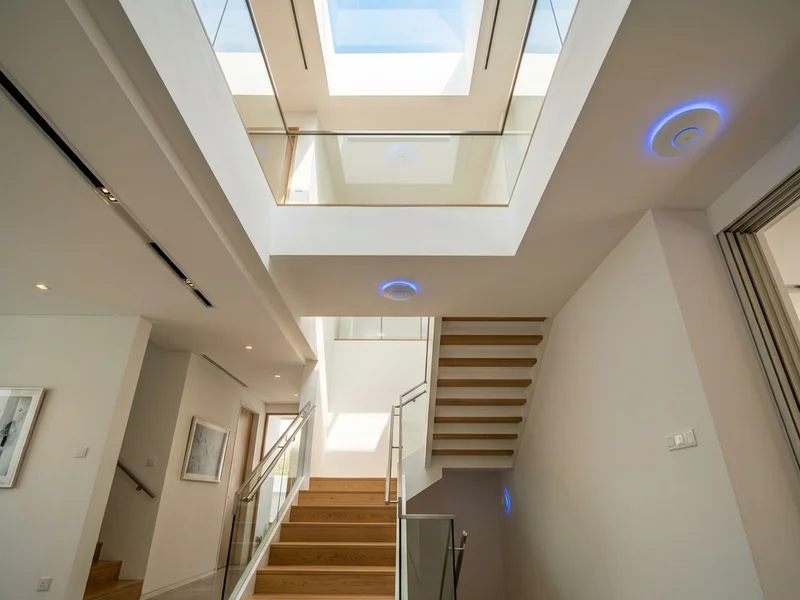
One mesh node per floor: central placement away from concrete walls.
Many homeowners experience Wi-Fi dead spots and assume they need a stronger router or a faster internet plan. In reality, the problem is almost always coverage: not speed. A Wi-Fi extender rebroadcasts an existing signal and can help in limited situations. A mesh system uses multiple nodes that work together as one network, providing better coverage than a single router. Dedicated access points, connected back to the network by cable, provide the best long-term performance for larger properties. Understanding the difference between these three options helps you choose the right solution.
Where to Place Wi-Fi Extenders or Mesh Nodes
- One node per floor is the baseline in a multi-storey landed home. In a large bungalow, two nodes per floor may be needed.
- Place nodes centrally, not in a corner or against a wall. The signal radiates in all directions: a central position maximises coverage.
- Avoid reinforced concrete walls, enclosed cabinets, and locations near microwave ovens, cordless phones, or baby monitors.
- Nodes must be within reasonable signal range of each other. A long chain of nodes through multiple concrete floors without intermediate nodes produces unreliable coverage.
A mesh system performs significantly better when nodes are connected to the main router via a wired backhaul: each node has a physical Cat 6 cable back to the main switch. Wireless backhaul consumes a portion of available bandwidth for inter-node traffic. If you are running cable during renovation, run a cable to each planned mesh node location.
Limitations of Consumer Mesh Systems with Security Installations
- Limited control over IP address assignment: difficult to maintain static IPs for cameras, intercoms, and alarm panels
- No VLAN support on most consumer units: security cameras share the same network as family devices and guests
- No remote management by a third party: your integrator cannot diagnose or fix the network remotely
- Automatic firmware updates can occasionally change network behaviour without warning
5. Cabling Standards: Cat 6, Cat 6A and Cat 7: Which Should You Install?
Cat 5e: Acceptable in Existing Installations Only
Supports 1 Gbps up to 100 metres. Was the standard for Singapore residential installations through the 2010s. Acceptable if already installed. Do not specify for new works: Cat 6 costs marginally more and performs significantly better.
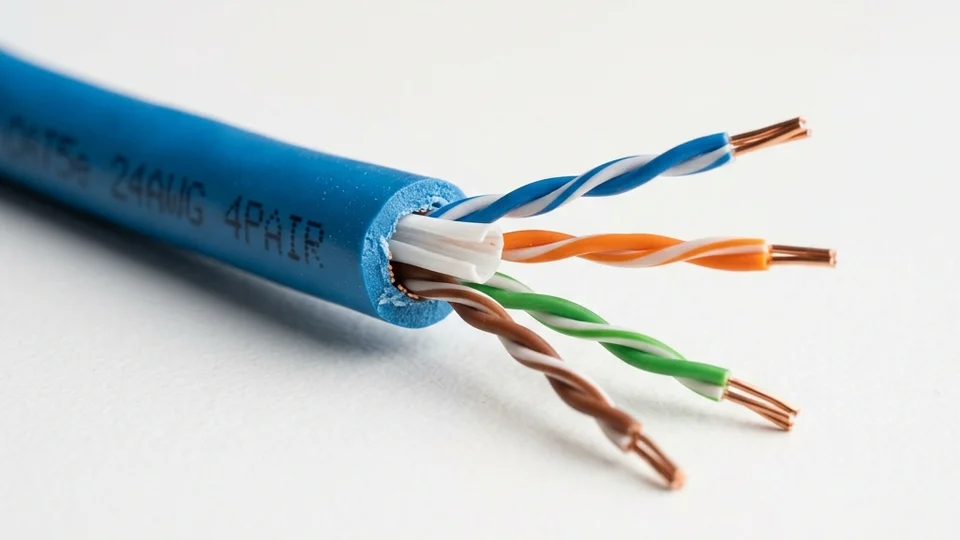
Cat 6: The Correct Specification for New Works
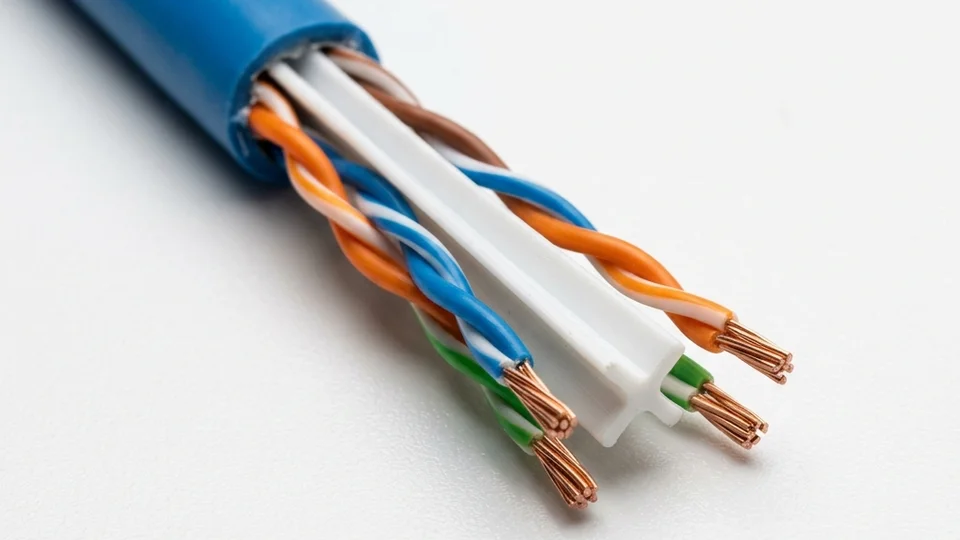
Supports 1 Gbps reliably and 10 Gbps up to 55 metres. Better crosstalk rejection than Cat 5e due to a central spline separator between the four twisted pairs. This is the correct specification for all new residential installations in Singapore today.
Cat 6A: Future-Proof for Major Renovations
Supports 10 Gbps up to 100 metres. Slightly thicker than Cat 6 but manageable in a standard Singapore landed home. The sweet spot if you are doing a full renovation and want to future-proof for the next 15–20 years. The incremental cost of the cable itself is modest.
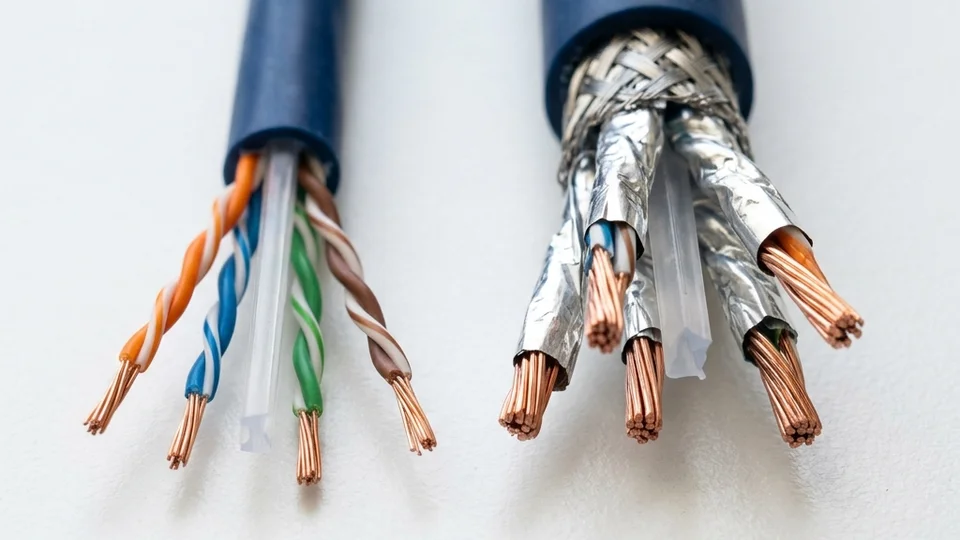
Cat 7: Do Not Specify for Residential Use
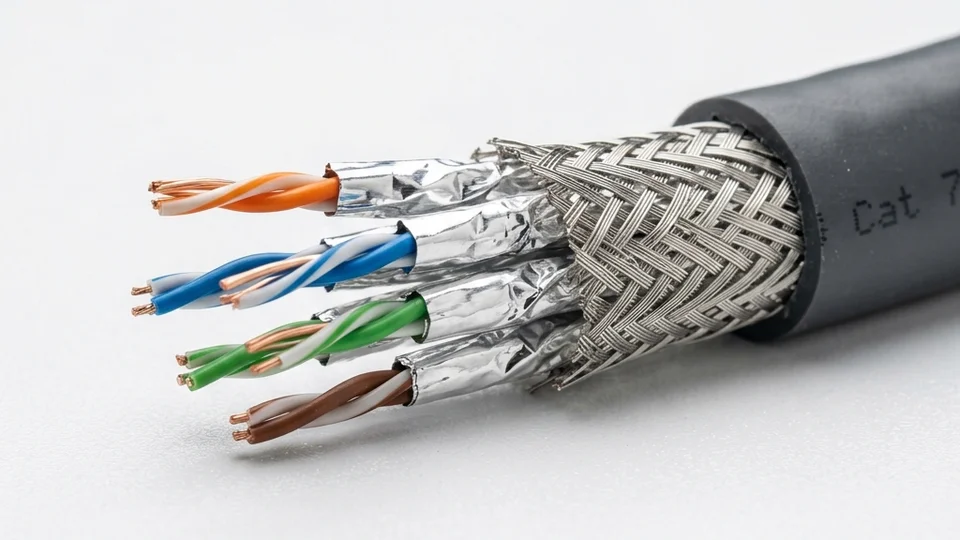
Designed for data centre environments. Requires shielded terminations and patch panels that residential installations do not use correctly. Improperly grounded Cat 7 cable in a residential setting can perform worse than Cat 6 due to noise from incorrect shielding. The complexity is not worth it for a landed home.
Specify Cat 6 as the minimum for all new cable runs in a Singapore landed home. If doing a major A&A or new build, upgrade to Cat 6A for future-proofing. Never specify Cat 7 for residential use.
Cat 3 Telephone Points Are Obsolete: Run Cat 6 Instead
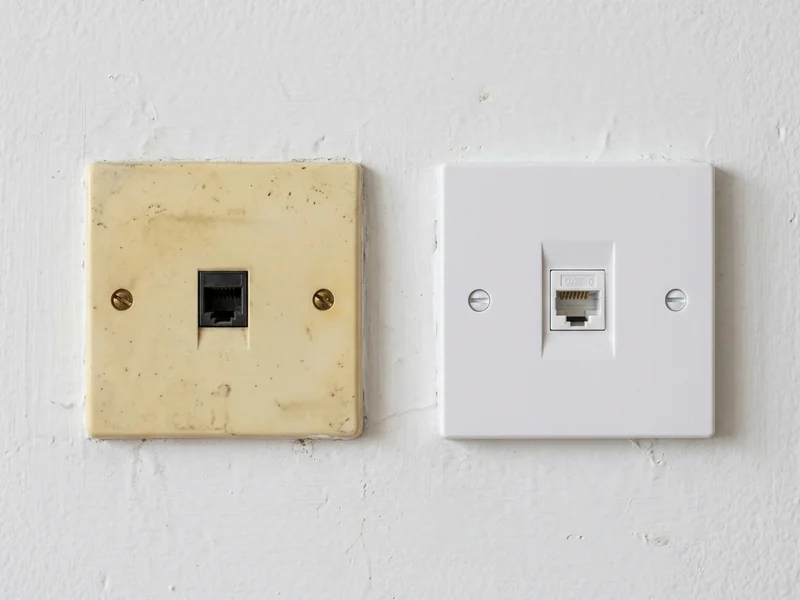
Cat 3 telephone point (left): obsolete. Cat 6 keystone point (right): supports all IP devices.
Many Singapore landed homes built before 2010 have Cat 3 telephone points in every room. These are now obsolete. PSTN analogue lines are being phased out, and the handsets that used them have been replaced by mobile phones and IP phones. If you are renovating, do not retain Cat 3 points: replace every planned telephone point with a Cat 6 network point.
A common approach is to run two Cat 6 points per room: one for the computer, one for the IP phone. However, Fanvil IP phones include a built-in network switch port on the back. The Cat 6 cable from the wall connects to the phone, and the phone's secondary port connects to the computer. One cable, two devices, no compromise on performance for normal office use.
For rooms where running new cable is not practical, Ruijie makes a wall-socket format access point mounting in a standard single-gang back box: one Cat 6 cable in, wired port plus Wi-Fi out. A clean solution for bedrooms and study rooms in existing landed homes where minimal disruption is a priority.
Run Conduit and Spare Cables During Renovation
If you are renovating now, run cable inside conduit wherever possible: a cable inside conduit can be replaced without opening the wall. Also run at least one spare Cat 6 to each room and each planned access point location. The material cost of a spare cable is trivial. Pulling a new cable through a finished wall two years later is not. We have seen homeowners spend more on remedial cabling than they spent on the original installation: entirely because nobody ran spare cables the first time.
6. Network Switches, PoE and SSID Strategy
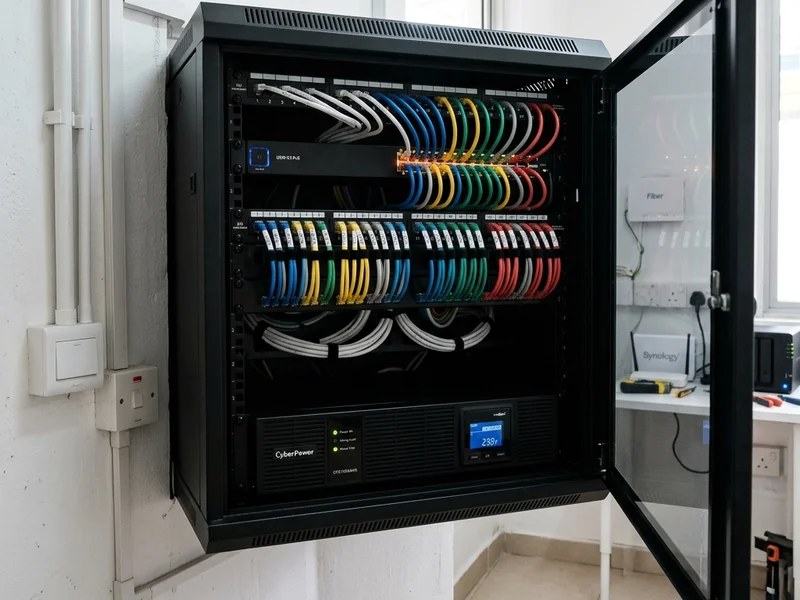
Properly racked PoE switch with labelled patch cables: powers cameras and access points over a single cable.
A network switch is the device that connects all your wired devices together inside the home. Think of it as a traffic controller: the router connects your home to the internet, and the switch connects all your devices to each other and to the router. Every Cat 6 cable from your rooms and camera positions terminates at the switch, which is usually located in your communications cabinet.
The switch is rarely the most visible component in the system. Most homeowners never see it after installation. However, it is often the device that determines how well everything else works. Every camera, access point, intercom monitor, and recorder connects through it. Choosing the right switch: the right port count, the right PoE budget, managed or unmanaged: and leaving room for future expansion is far more important than many homeowners realise when they are comparing router brands.
Power over Ethernet (PoE)
A PoE switch delivers electrical power through the same Cat 6 cable that carries data. Wi-Fi access points, IP cameras, IP intercoms, and door access controllers can be powered directly from the switch: no separate power adaptor or nearby power socket needed at the device location. This simplifies installation significantly, reduces cable clutter, and means your security devices remain powered during brief power disruptions if the switch is on a UPS.
Managed vs Unmanaged Switches
An unmanaged switch is plug-and-play with no configuration interface: adequate for a simple home with no security systems. A managed switch gives you full control and visibility: VLANs to separate your camera network from your home network, QoS port priorities to ensure camera traffic is never starved, and port status monitoring to see which devices are connected and how they are performing. For any home with IP cameras, access control, or intercoms, a managed switch is the right choice.
IP cameras generate continuous network traffic: a system with eight 4K cameras can produce 30–50 Mbps at all times. Best practice is to place cameras on a dedicated VLAN, isolated from the family network. This prevents camera traffic from congesting your general network and prevents any family device from having an access path to the cameras or NVR. We configure this as standard on all Securevision installations.
SSID Strategy: Same Name or Different Names Per Floor?
Your SSID is the name of your Wi-Fi network. With multiple access points in a landed home, you have a choice: one SSID for all access points, or different names per floor.
| Approach | Behaviour | Problem |
|---|---|---|
| Same SSID across all access points | Devices see one network and connect automatically | Sticky client: devices reluctant to hand off to a closer access point |
| Different SSID per floor | You manually choose which network to connect to | Requires manual switching: inconvenient for family members |
| Same SSID with 802.11r fast roaming (managed APs) | Seamless automatic handoff between floors | Requires managed access points: Omada or Ruijie |
For managed access point systems, same SSID with 802.11r fast roaming and Band Steering enabled is the correct solution. These features actively push devices to roam to the nearest access point when signal quality drops: the same experience as enterprise Wi-Fi in an office building.
7. IP Addresses, Static IPs, and Why Changing Your Router Can Break Everything

Security devices use static IP addresses: fixed, never changing, always reachable.
Every device on a network is identified by an IP address: a number the network uses to direct data to the right device. Most homeowners never need to think about this until they change their router. At that point, cameras stop working, the intercom becomes unreachable, and the alarm panel cannot report to the monitoring centre. Understanding why this happens: and how to prevent it: saves significant time and expense.
Devices receive their network address in one of two ways:
- Dynamic (DHCP): the router assigns an address automatically when the device connects. The address can change. Fine for phones, tablets, and laptops.
- Static: the address is fixed and never changes. Mandatory for security devices: IP cameras, NVRs, intercoms, alarm panels, and access control systems: because the system software needs to know the exact address of each device to communicate with it reliably.
Why Router Replacement Breaks Cameras and Intercoms
This is one of the most common support calls we receive: a homeowner has upgraded their ISP router or installed a new mesh system, and suddenly the cameras are offline, the intercom is unreachable, or the alarm panel cannot communicate with the monitoring centre.
The cause is almost always a subnet mismatch. Your old router may have been on the 192.168.1.x subnet. Your new router, from a different manufacturer, may default to 192.168.0.x. Your cameras, set to static IPs in the 192.168.1.x range, are now on a different subnet: they cannot communicate.
Do: Document your existing subnet (e.g. 192.168.1.x), your gateway IP (e.g. 192.168.1.1), and the static IP assigned to every security device before you touch anything. Configure your new router to use the same subnet and gateway IP as the old one. Your security devices will reconnect without reconfiguration.
Don't: Accept the new router's default settings without checking. Don't assume the ISP technician knows about your camera system. Don't perform a router swap on a Friday afternoon: if something goes wrong, you want your integrator available.
If the Router Has Already Been Changed
If this has already happened, the fastest recovery path is to log into the new router's settings and change its address range to match the old one: typically from 192.168.0.x back to 192.168.1.x, or whichever range the old router used. If you documented the old settings beforehand, this takes five minutes. If you did not, you will need to identify each affected security device individually: usually by connecting a laptop to the same network and scanning for active devices: and reconfigure the static addresses to match the new router's range. Your installer can carry out this process remotely if you provide them with access to the router's management interface.
The ISP Combo Unit Problem
Many Singtel and MyRepublic subscribers use the ISP-provided unit as both modem and router. When you add a separate managed router or mesh system behind it, you create double-NAT: your devices are behind two routers, each with its own network. This causes problems with security system communication, port forwarding, and remote access. The correct configuration is to put the ISP unit in bridge mode, letting your managed router handle all routing. This requires a call to your ISP: but it is worth doing properly.
Maintain a Network Document
Every home with managed security systems should have a one-page document recording: the router's subnet and gateway IP, the static IP assigned to every security device, ISP account details, and login credentials for the router and managed switches. Store a printed copy in the comms rack. This document saves hours of diagnostic time on every service call: whether it is us attending, a new contractor coming in, or simply you trying to remember which IP belongs to which camera.
8. Guest Networks: Separating Your Visitors from Your Main Network
A guest network is a separate Wi-Fi network that gives visitors internet access without allowing them to reach any device on your main home network. Setting one up is straightforward on most modern routers and access points, and it provides meaningful protection for your security systems and personal devices.
- Network isolation enabled: prevents guest devices from communicating with the main network or with each other
- Bandwidth limit: caps bandwidth available to guests so a visitor streaming 4K does not affect your household
- Separate, simple password: one you can share freely and change periodically without affecting your main network devices
Your domestic helper, your children's friends, contractors on site, and family visitors all connect to the guest network. If any of their devices carry malware, it cannot spread to your main network. If a visitor's device is compromised and someone attempts to access your cameras through it, the guest network has no path to the camera system.
9. Network Security Basics: Passwords, Encryption and Open Wi-Fi Risks
Modern homes contain many devices connected to the network: CCTV systems, intercoms, smart locks, home automation, and more. A poorly secured network can expose these devices to unnecessary risks. The good news is that basic security practices provide significant protection and do not require specialist knowledge.
An open Wi-Fi network: one without a password: is one of the most common and most easily avoided risks. In a Singapore landed property, the Wi-Fi signal typically extends across your garden, to the street, and into neighbouring properties. The risks of an unsecured network include:
WPA3 or WPA2 encryption, set in your router's wireless settings. A strong password of at least 12 characters mixing letters, numbers, and symbols. The router's default admin credentials changed from the factory default. If your router is still using "admin / admin" as its login, change it today.
10. Cable Termination, Rack Management, and Documentation
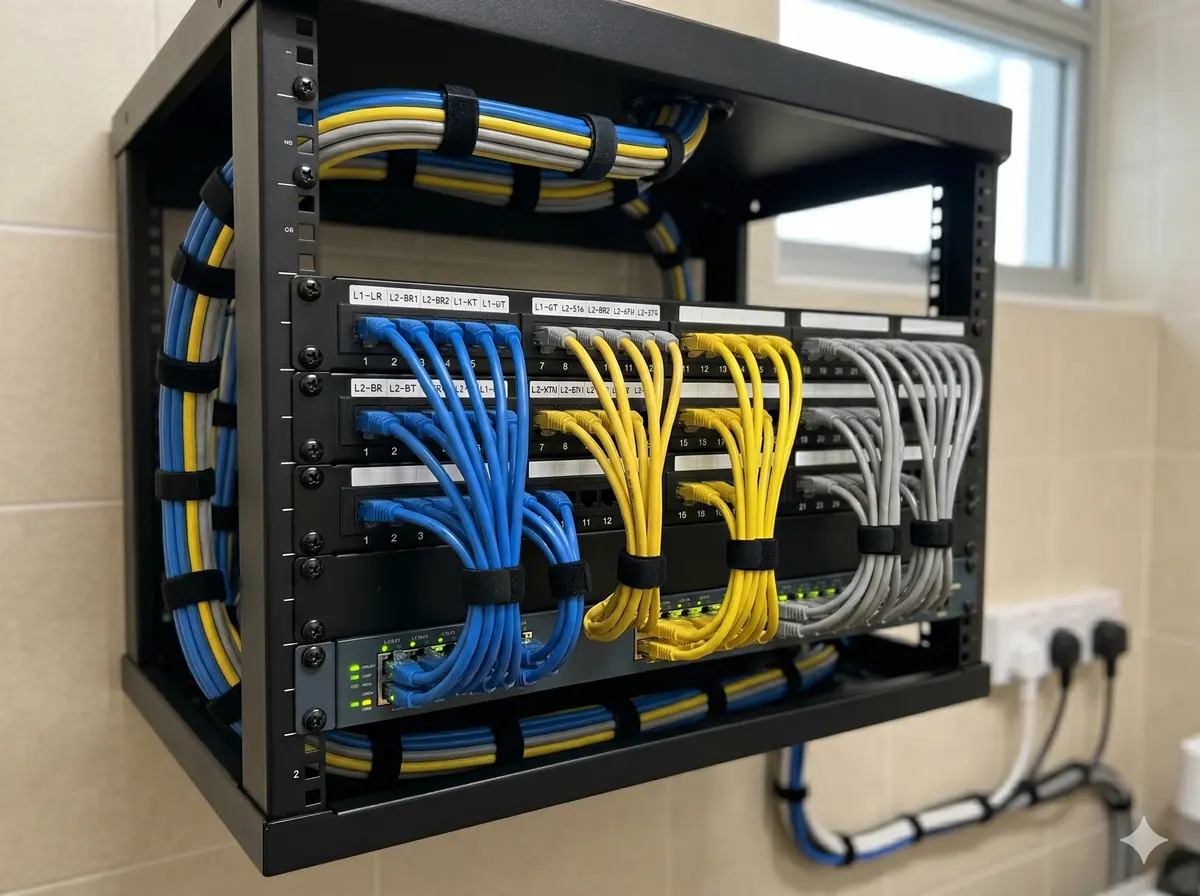
Properly terminated patch panel: switch connects via patch cables, not directly to wall runs.
How your network cables are terminated and managed at the distribution point has a direct impact on how easy the system is to fault-find, extend, and maintain over its lifetime.
Patch Panel vs Direct Connection
The professional approach uses a patch panel: all Cat 6 cables from rooms terminate into the back of a patch panel, and short patch cables connect panel ports to switch ports. You never need to touch the fixed cable runs in the wall: all changes are made at the patch panel. The shortcut: terminating wall cables directly into a switch on an open shelf: works initially, but every cable trace involves handling the fixed runs. Cables get pulled, terminals loosen, and the original neat bundle becomes a tangle within two years.
The T568B Termination Standard
There are two wiring standards for Cat 6 termination: T568A and T568B. Both work, but they must be consistent end-to-end: if one end is terminated to T568A and the other to T568B, the link will fail or perform poorly. We regularly arrive at newly renovated Singapore landed homes to find every wall point terminated differently, because different electricians used different standards. Specify T568B in your M&E schedule. It costs nothing to state upfront and saves significant rework later.
Cable Labelling and Documentation
We have tested entire houses point by point because nobody labelled the cables during installation. On one job: 24 Cat 6 runs across three floors: every cable was unmarked. That is two hours of testing before we could begin switch configuration. Every cable should be labelled at both ends with a consistent reference: for example, L2-BR1-1 (Level 2, Bedroom 1, Point 1). Wall plates carry the same label. A simple floor plan marking each point's reference code should be stored in the comms cabinet and updated whenever the network changes.
Documentation Belongs to the Homeowner
Most homeowners receive the equipment. Far fewer receive proper documentation. Yet documentation is often what determines whether the network remains easy to manage and maintain five or ten years later: especially when a new contractor attends the site.
At project completion, the homeowner should receive a network diagram showing how all devices connect, an IP address schedule listing every device's assigned address, equipment model numbers and serial numbers, login credentials for the router, switch, and network controller, warranty information and service contacts, internet service provider account details, and configuration backup files where the platform supports it.
Without proper documentation, every new contractor who attends the site must spend time rediscovering information that should already exist: testing cables, guessing IP ranges, resetting passwords. The network belongs to the homeowner. The information about the network should belong to the homeowner as well. A professional installation should deliver both.
Rack and Cabinet Management
A small wall-mounted rack cabinet: even a 6U or 9U unit: makes an enormous difference to long-term manageability. It houses the patch panel, switch, router, and a small UPS in a single organised enclosure with proper cable management. Airflow is better than inside a closed cabinet. Access for maintenance is straightforward. For any landed home with more than one switch or more than twelve cable runs, a small rack cabinet is the right investment.
11. Testing Your Network Before the Walls Are Closed
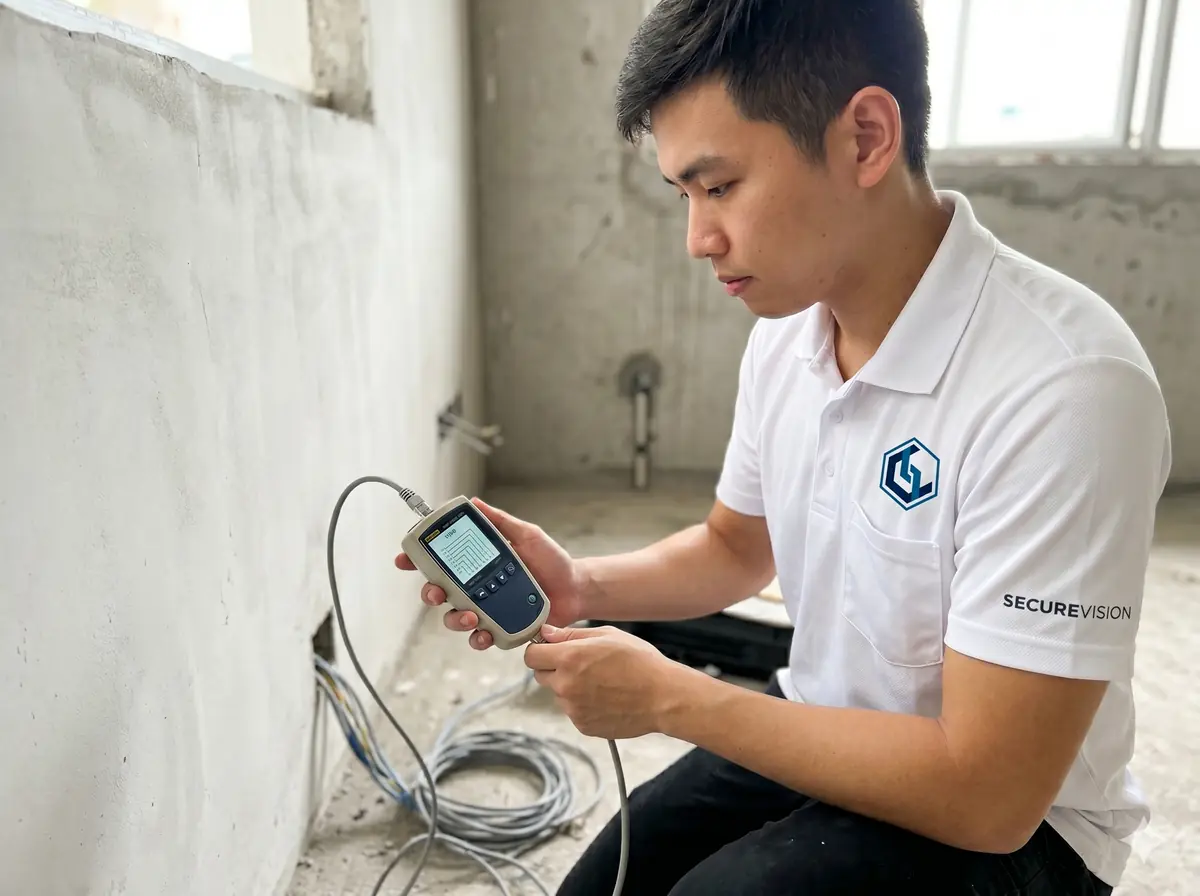
Wire map test: confirms all eight conductors correctly terminated before walls are closed.
Testing network cable after installation and before walls are plastered is not optional: it is the only point in the process where faults can be found and fixed at zero additional cost. Once the walls are closed, rectifying a faulty cable run means opening the wall.
The minimum test every installed Cat 6 cable should pass is a wire map test: confirming that all eight conductors are correctly connected at both ends with no shorts, opens, crossed pairs, or split pairs. A continuity test alone is not sufficient: it passes a cable with incorrectly mapped pairs and will not detect a hidden join inside the wall.
The Hidden Join Problem
A hidden join occurs when an electrician runs short of cable mid-run and joins two shorter pieces together inside the wall cavity. The join is invisible once plastered and passes a continuity test. But it increases impedance at that point, causing signal reflections that degrade performance at higher speeds. A wire map tester with time-domain reflectometry (TDR) capability will show an anomaly in the cable length reading at the join location. Ask your contractor: "Can you show me the TDR trace for every point?" A blank look means they are not testing properly.
Practical Testing Options for Residential Installations
Professional Fluke DSX certification equipment costs SGD 8,000–12,000 and is not cost-justified for a landed home. The practical middle ground is a cable qualifier in the SGD 300–800 range:
- Fluke MicroScanner series: wire map, length, and basic fault identification. Widely used by professional cabling contractors in Singapore
- Klein Tools VDV500 series: wire map and continuity, entry-level but far better than no testing
- Platinum Tools or similar mid-range qualifiers: wire map plus basic pass/fail against Cat 6 speed parameters
Require a wire map test result for every installed point, a length reading for each run, and a written pass/fail record. If your contractor cannot produce this, they have not tested. Any competent structured cabling contractor will have this equipment as a matter of course. Test before the walls are closed: the thirty-minute testing session during installation eliminates the cost and disruption of a wall opening later.
12. Maintaining Your Network: Firmware, Monitoring, and UPS Protection

Managed network dashboard: every device, every port, every access point visible remotely.
Network equipment requires maintenance just like any other installed system in your home. Routers, switches, and access points run firmware updated periodically to fix security vulnerabilities and improve performance. A router running 2021 firmware in 2026 may have known vulnerabilities that have been publicly documented and exploited.
Firmware Updates
Consumer devices typically update firmware automatically. Managed switches and enterprise-grade access points require manual updates or can be configured to update on a schedule through the management software. As part of our annual maintenance programme for homes we manage, we review firmware versions across all network equipment and apply updates during the service visit.
Remote Network Monitoring
For homes with managed network equipment: Omada or Ruijie: the management software provides a real-time view of the entire network: which devices are connected, bandwidth consumption per port, Wi-Fi client counts and signal strength per access point, and device uptime. Alerts notify you or your integrator when a device goes offline, when a switch port fails, or when bandwidth spikes unexpectedly. In many cases, faults can be diagnosed and resolved remotely without a site visit.
UPS: Power Protection for Network Equipment
A power interruption that restarts your router and switch also takes your IP cameras offline, interrupts NVR recording, and disrupts your access control system. A small UPS on the network rack: typically a 650VA or 1000VA unit: provides 15–30 minutes of backup power to network equipment alone. Sufficient to ride through brief power interruptions common in Singapore during storms, and allows graceful shutdown during longer failures, preventing NVR database corruption. Budget SGD 150–300 for a suitable residential UPS: one of the highest-value additions to any security and network installation.
Most Network Problems Are Not Hardware Problems
When homeowners experience slow Wi-Fi or unreliable connectivity, the immediate assumption is often that the router has failed and needs replacing. In reality, most network problems have nothing to do with the hardware itself.
Poor access point placement is the most common cause: a single router on the ground floor of a three-storey landed home cannot provide adequate coverage to the top floor regardless of how powerful it is. Congested Wi-Fi channels caused by neighbouring networks competing on the same frequency reduce throughput without any fault in the hardware. Incorrect network configuration, outdated firmware, and excessive numbers of devices competing for bandwidth all produce symptoms that look like hardware failure but are not.
A new router installed in the wrong location usually performs no better than the old one. A faster internet plan does not solve a Wi-Fi coverage problem: it addresses a completely different part of the system. Replacing equipment without identifying the actual cause often results in unnecessary spending and little improvement in the experience that prompted the complaint.
A proper diagnosis should always come before a hardware replacement decision. In many cases, improving the design of the existing network: relocating an access point, adjusting channel settings, updating firmware, or adding a wired backhaul connection: delivers better results than replacing equipment at significantly lower cost.
13. Recommended Platforms: Ruijie and TP-Link Omada
How a Typical Landed Home Network Is Structured
Before discussing specific platforms, it helps to understand how the components of a modern home network connect together. Many homeowners think of the network only as a way to access the internet: in reality it has become the backbone that connects security, entertainment, communications and home automation throughout the property.
A typical Singapore landed home network follows this structure: the internet service provider's connection enters the property and connects to the router. The router connects to a managed PoE switch, which distributes both data and power to every connected device: Wi-Fi access points on each level, CCTV cameras and the NVR recorder, the intercom system, smart TVs, desktop computers, and the home automation controller. Each of these devices connects back to the same central switch via a dedicated Cat 6 cable. Mobile phones, tablets and laptops connect wirelessly through the access points.
The central switch is the hub of the entire system. Its location, capacity, and management capability determine how well everything else performs: which is why the communications cabinet location and switch specification are decisions that deserve careful attention during renovation planning.
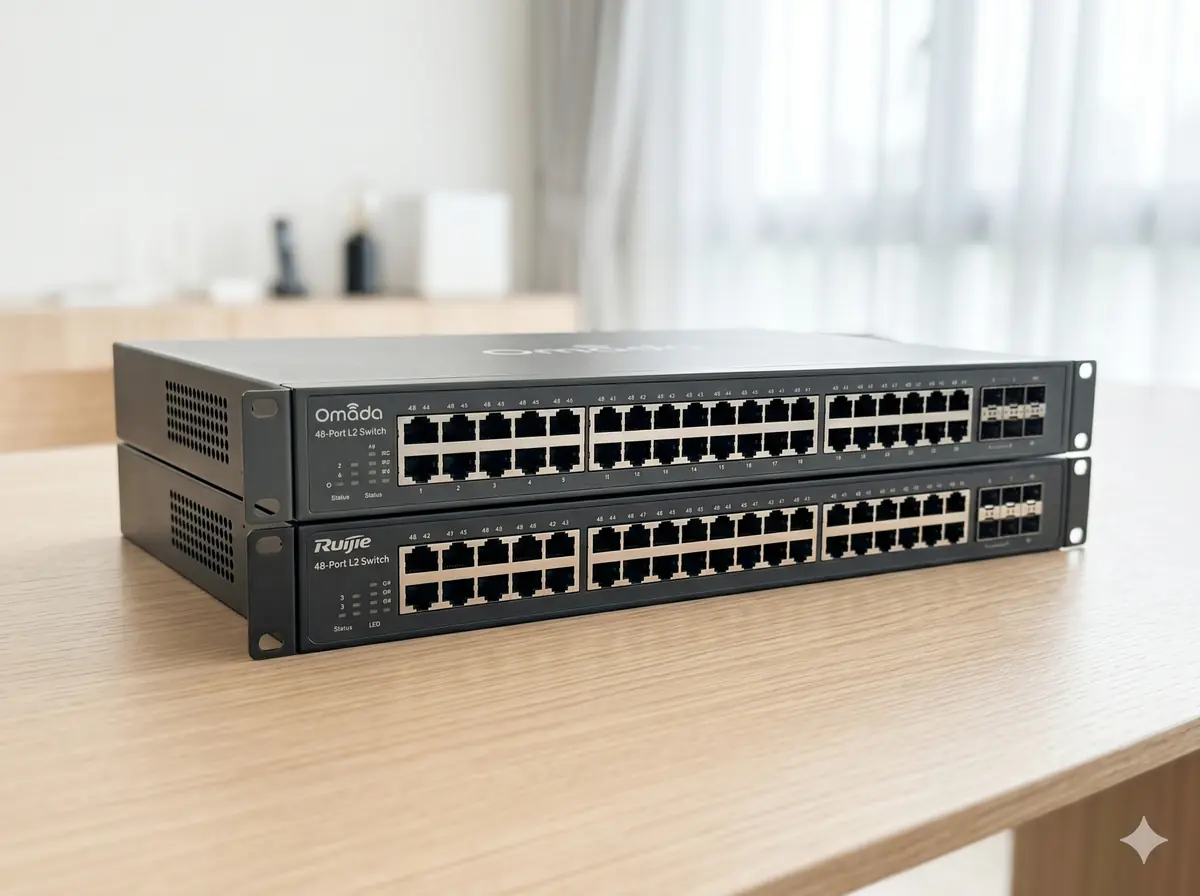
Ruijie and TP-Link Omada: Securevision's preferred platforms for Singapore landed homes.
Many homeowners begin by asking which brand is best. In practice, the better question is whether the platform can support the requirements of the property and whether it can be managed effectively over the long term. The best platform is not necessarily the one with the longest feature list or the highest speed specification. It is the one that provides reliable performance, straightforward support, and room for future growth. Technology changes. Good design principles do not.
After evaluating numerous Wi-Fi and network platforms, Securevision has standardised on two ecosystems for Singapore landed home installations: Ruijie Networks and TP-Link Omada. The choice between them depends on the scale and complexity of the installation.
TP-Link Omada
The Omada ecosystem: EAP series access points, TL-SG series managed switches, and the Omada SDN controller: is our go-to recommendation for most landed homes. It offers genuine enterprise features (VLANs, 802.11r fast roaming, band steering, PoE management, SSID isolation) at a price point that makes sense for residential use. The Omada controller software runs in the cloud or on a local server, giving us and the homeowner a single management interface for the entire network. We can see every connected device, push firmware updates, reconfigure VLANs, and diagnose faults remotely without a site visit.
Ruijie Networks
Ruijie is our preferred platform for larger or more complex installations: GCBs, large bungalows, and properties requiring enterprise-grade reliability. Ruijie's Reyee cloud platform provides the same remote management capability as Omada, with stronger features for multi-SSID management, more granular QoS controls, and their wall-socket AP format: the RG-RAP series: which mounts in a standard single-gang back box and provides both a wired port and Wi-Fi coverage from one installation point.
Remote Support: What It Means in Practice
Both platforms allow us to manage your network remotely with your permission. If your cameras go offline due to a VLAN misconfiguration, we can identify and fix it from our office. If you need a new device assigned to the correct network segment, we can do that remotely. If you call us because your Wi-Fi is slow, we can see the signal levels, client counts, and channel utilisation for every access point in your home before we even pick up the phone.
Consumer mesh systems like Google Nest or Eero do not offer this capability to third parties. That is fine for a simple household with no integrated security systems. For a home where the network is the backbone of cameras, access control, intercoms, and IP phones, the ability for your integrator to see and manage the network remotely is a meaningful service advantage.
14. Internet Speed: How Much Do You Really Need?
One of the most common misconceptions is that upgrading to a faster internet plan will solve every networking problem. In reality, internet speed and Wi-Fi coverage are two completely different things. A home can have the fastest internet connection available and still suffer from dead zones and buffering if the internal network is not properly designed.
For most Singapore landed homes, a 1 Gbps fibre plan provides more than enough capacity for everyday use. If you are experiencing slow Wi-Fi, the problem is almost always internal network design or coverage: not your internet plan.
| Household Type | Recommended Plan |
|---|---|
| Couple or small family with moderate usage | 500 Mbps |
| Family of four to six with regular streaming | 1 Gbps |
| Heavy streaming, gaming and smart home users | 2 Gbps |
| Very large homes with extensive device usage | 2 Gbps and above |
Your Internal Equipment Matters As Much As Your Internet Plan
A faster internet plan is only useful if the router, switches, and Wi-Fi equipment inside the home can handle the increased throughput. This is a point many homeowners miss when upgrading their broadband: the bottleneck is often not at the street, but inside the house.
Older routers are frequently rated for speeds lower than a modern 1 Gbps or 2 Gbps fibre plan can deliver. A router purchased five years ago may have a maximum throughput of 300 to 500 Mbps: meaning the additional capacity from a plan upgrade never reaches your devices at all. Similarly, an older unmanaged network switch may have throughput limitations that create congestion when multiple devices are active simultaneously.
Wi-Fi extenders are the most common internal bottleneck. Many extenders: particularly older models: operate on the 2.4 GHz frequency band. This band is significantly slower than the 5 GHz band, more susceptible to interference from neighbouring networks and household appliances, and shared with a wide range of other wireless devices including baby monitors, cordless phones, and microwave ovens. An extender running on 2.4 GHz will deliver a fraction of the speeds available on 5 GHz, regardless of how fast the internet plan is. If your home still uses extenders rather than properly installed access points, and if those extenders are operating primarily on 2.4 GHz, upgrading the internet plan will produce no measurable improvement in day-to-day performance.
When evaluating whether a faster internet plan is justified, the correct sequence is: first confirm that your router can handle the higher speed, then confirm that your switches are not a bottleneck, then confirm that your Wi-Fi equipment is operating on 5 GHz rather than 2.4 GHz, and only then consider whether the internet plan itself is the limiting factor.
A faster internet plan cannot solve a Wi-Fi coverage problem or a hardware bottleneck. In our experience across Singapore landed properties, homeowners who upgrade their broadband plan and still see no improvement almost always have the same underlying issue: the bottleneck is inside the house. The most common culprits are an older router with insufficient throughput, an unmanaged switch running at capacity, or a Wi-Fi extender operating on the congested 2.4 GHz band rather than 5 GHz.
15. Future-Proofing Your Home Network
Most homeowners renovate a property only once every ten to twenty years. The network infrastructure installed today may still be in use long after the current Wi-Fi generation has been superseded. Planning for future requirements during renovation costs very little: retrofitting afterwards can be very expensive.
Twenty years ago, most Singapore homes only needed internet access for a few computers. Today, a typical landed property may include CCTV systems, intercoms, smart locks, home automation, solar monitoring, EV chargers, and network-attached storage: all depending on the same network infrastructure. The number of connected devices continues to increase, and the systems that will be connected five or ten years from now may not even exist yet.
When planning your network, consider not just today's requirements but where additional access points may be needed, where CCTV cameras may be added, whether smart home expansion is planned, and whether future renovations might open up areas that currently have no network access. Installing additional points and spare cable during the current renovation costs a fraction of what it would cost to retrofit later.
We have carried out network upgrades in Singapore landed homes where the original renovation was done only five years earlier. In almost every case, the homeowner wished they had run more cable, installed more conduit, or sized the communications cabinet for growth. We have yet to meet a homeowner who said they had installed too many network points.
The network should be treated as critical infrastructure, in the same category as electrical wiring and plumbing. A well-planned network provides flexibility for technologies that may not even exist yet. Most homeowners never regret planning ahead: but we regularly hear from homeowners who regret not planning enough during their renovation.
16. Why Spare Conduits Are One of the Best Investments in Your Renovation
Technology changes much faster than buildings. While a network cable may become obsolete in fifteen years, a spare conduit provides a pathway for future upgrades without opening walls.
A spare conduit allows new cables to be installed in the future without hacking walls, damaging ceilings, removing finished carpentry, or disrupting a completed renovation. The cost of installing spare conduits during renovation is negligible. The cost of not having them: when you want to add a camera position, extend a cable run, or pull a new cable type: can be significant.
A recurring pattern in our work: a homeowner wants to add a CCTV camera at the rear of the property or run a cable to a new study room. The renovation was completed two years earlier: clean walls, finished carpentry, no spare conduit. What should be a straightforward cable pull becomes a multi-day exercise involving wall-chasing and repainting. A spare conduit installed during renovation would have made it a thirty-minute job.
Where practical, consider installing spare conduits between the communications cabinet and the roof, the communications cabinet and the gate, the communications cabinet and each TV console position, and any areas identified for future expansion. A spare conduit is often one of the most valuable investments made during renovation: and one of the easiest to overlook.
If you are renovating now, run cable inside conduit wherever possible: a cable inside conduit can be replaced without opening the wall. Also run at least one spare Cat 6 to each room and each planned access point location. We have seen homeowners spend more on remedial cabling than they spent on the original installation, entirely because nobody ran spare cables the first time.
One homeowner completed a major renovation and installed only the network points they believed they needed at the time. Two years later they decided to add additional CCTV cameras at the rear of the property, a video intercom at the side gate, and a dedicated home office on the second floor. The equipment itself was not expensive. The challenge was getting the cables there. Several walls had to be opened and repaired, visible surface trunking had to be accepted in the study because the conduit had not been run, and the driveway had to be trenched for the gate cable. The additional cabling work ultimately cost more than the equipment being added. Technology requirements change. Infrastructure should always be planned with that in mind.
17. Choosing the Right Location for Your Communications Cabinet
The communications cabinet is where your router, switches, CCTV recorder, and internet termination equipment are located. Its placement affects ventilation, maintenance access, network performance, and how easy the system is to manage over the years.
Common mistakes include placing the cabinet inside a wardrobe, inside a metal enclosure with poor ventilation, in a poorly accessible storeroom, or in a location that is difficult to reach for maintenance. Network equipment generates heat and requires airflow. Equipment in an enclosed space without ventilation will run hot, reducing reliability and shortening component life.
We regularly encounter communications cabinets installed inside wardrobes or enclosed metal enclosures with no meaningful ventilation. The equipment runs hot. Within two or three years the switch begins dropping ports intermittently: a fault that is difficult to diagnose remotely and easy to misattribute to cabling or device problems rather than its actual cause. Adequate ventilation and easy access are not optional: they are what determines whether the system performs reliably five years after installation.
A good cabinet location provides adequate ventilation, easy access for maintenance and future changes, reliable power with room for a UPS, space for future expansion as additional equipment is added, and access to the network cabling routes. Treat the communications cabinet as critical infrastructure rather than an afterthought: the location selected today may affect your network for twenty years.
A small wall-mounted rack cabinet: even a 6U or 9U unit: makes an enormous difference to long-term manageability. It houses the patch panel, switch, router, and UPS in a single organised enclosure with proper cable management. For any landed home with more than one switch or more than twelve cable runs, a rack cabinet is the right investment.
18. When You Cannot Run Cables: Wireless Bridges
In some situations, installing new network cabling is genuinely impractical: detached home offices, outdoor pavilions, gatehouses, or separate buildings across a garden. In these situations, a point-to-point wireless bridge can provide reliable connectivity without trenching.
A wireless bridge creates a dedicated wireless link between two locations using directional equipment: unlike a standard Wi-Fi access point, which broadcasts in all directions, a wireless bridge focuses its signal between two specific points. When properly designed and installed, it can provide reliable, high-speed connectivity across distances that would make cable installation impractical or very expensive.
Wireless bridges are a practical solution for Singapore properties with separate structures: a detached home office, a pool pavilion, or a gatehouse at the front of the property. We have installed these successfully across distances of thirty to fifty metres with reliable throughput. The key variable is line of sight: obstructions between the two antenna positions, including mature landscaping and concrete pillars, significantly affect performance and must be assessed during the site survey before any equipment is specified.
Wireless bridges are useful when cabling between buildings is impractical, when trenching across a garden or driveway would be too disruptive, or when a separate structure needs network connectivity without major civil works. They should not, however, be viewed as a replacement for internal network cabling. If you can run a cable, run the cable: a wired connection remains the most reliable solution whenever it is practical to install one.
19. Home Network Planning Checklist and Frequently Asked Questions
Before renovation begins, working through this checklist helps identify requirements that are easy and inexpensive to address during construction but costly to correct afterwards.
Pre-Renovation Planning Checklist
- Number and location of Wi-Fi access points required per floor
- Number of network points per room: TV console, study, bedrooms, access point positions
- CCTV camera locations and cable routes to communications cabinet
- Intercom door station and indoor monitor locations
- Communications cabinet location: ventilation, access, power, space
- Spare conduits between cabinet and roof, gate, TV positions, and expansion areas
- Power points for network equipment, including UPS
- Internet service provider entry point and modem location
- Smart home controller location and network requirements
- Solar monitoring, EV charger, and other specialised network requirements
- Cable testing plan: wire map test before walls are closed
- Cable labelling standard: agree with contractor before installation begins
Frequently Asked Questions
| Question | Answer |
|---|---|
| Do I still need network cables if I have Wi-Fi? | Yes. Wi-Fi provides convenience and mobility, but cables provide stability, reliability and consistent performance. Fixed devices: smart TVs, CCTV recorders, gaming consoles, intercoms: should always be wired. A properly designed home network uses both. |
| Should I install Cat 6 or Cat 6A? | Both are suitable for modern Singapore homes. Cat 6 is the correct minimum standard for any new installation. Cat 6A is generally preferred for major renovations where future-proofing is important: it supports higher speeds over longer distances and costs only marginally more for the cable itself. |
| Is Cat 7 worth installing at home? | For most homeowners, no. Cat 7 was designed for data centre environments and requires specialised termination that residential installations rarely implement correctly. Improperly installed Cat 7 can actually perform worse than Cat 6. The additional cost is not justified for residential use. |
| What is Cat 6E? | Cat 6E is primarily a marketing term used by some manufacturers: it is not a recognised official cabling standard. When evaluating cabling, focus on Cat 6 and Cat 6A, which have clear, well-established performance specifications. |
| How many Wi-Fi access points do I need? | This depends on the size, layout and construction of your property. As a starting point, one access point per floor is the minimum for most Singapore landed homes. Larger bungalows, properties with thick concrete walls, or homes with multiple wings may require more. A site assessment before renovation is the most reliable way to determine this. |
| Can mesh Wi-Fi replace network cabling? | No. Mesh systems improve Wi-Fi coverage but do not replace the reliability, performance, or security benefits of wired connections. For a home with integrated security systems, a managed wired network is always the preferred foundation. |
| Where should I place my router or communications cabinet? | In a central, well-ventilated location that is easily accessible for maintenance. Avoid enclosing it in a wardrobe or metal cabinet without adequate airflow: network equipment generates heat and enclosed spaces reduce reliability and component life. |
| What internet speed do I need for a Singapore landed home? | For most families, a 1 Gbps fibre plan is more than sufficient. If you are experiencing slow performance, the cause is almost always internal network design or Wi-Fi coverage: not internet speed. Upgrading to a faster plan will not resolve a coverage problem. |
| Why is my Wi-Fi slow upstairs? | This is almost always a coverage issue rather than an internet speed problem. Concrete floors and walls between levels significantly reduce Wi-Fi signal strength. The solution is an additional access point on the affected level: not a faster router or a more expensive internet plan. |
| Should CCTV cameras use Wi-Fi or cables? | Cables wherever practical. CCTV cameras generate continuous network traffic and are security-critical devices. A wired connection is more reliable, less susceptible to interference, and easier to troubleshoot. Wi-Fi cameras are acceptable for situations where running cable is genuinely impractical. |
| What is PoE and why does it matter? | Power over Ethernet allows both power and data to travel through a single network cable, eliminating the need for a separate power adaptor at each device. CCTV cameras, Wi-Fi access points, intercoms, and door stations can all be powered this way. For any home with multiple security or networking devices, a PoE switch significantly simplifies installation and reduces cable clutter. |
| Why did my CCTV stop working after I changed my router? | The most common cause is a change in the network address range: your old router and new router use different address ranges, and your cameras were set to fixed addresses that no longer work on the new network. Before changing any router, document your existing network settings and configure the new router to use the same address range. If in doubt, consult your installer before making changes. This is one of the most common support calls we receive, and it is almost always preventable with fifteen minutes of documentation before the router is touched. |
| Can I add more network points after renovation? | Yes, but it is more expensive and disruptive than installing them during renovation. Adding network points afterwards typically requires wall-chasing, repainting, and visible trunking where the walls cannot be opened. The cost of additional points during renovation is a fraction of the retrofit cost. |
| Should I install spare cables during renovation? | Yes. The material cost of spare cables is relatively small. Pulling a new cable through a finished wall two years later is not. Install at least one spare Cat 6 to each room and each planned access point location: you will very likely use them. In our experience, homeowners who skipped spare cables during renovation have almost always needed them within five years. |
| How long should network cabling last? | Quality cabling installed correctly can remain in service for twenty years or more, outlasting several generations of routers, switches, and wireless equipment. This is why the cable specification and installation quality matter so much: it is the one component that is genuinely difficult to change after the renovation is complete. The cabling is typically the last component we replace in any Singapore landed home: it outlasts routers, switches, access points, and sometimes the devices that connect to it. |
The cheapest time to build a good network is during renovation. Most network improvements are straightforward to implement when the walls are open and the electrician is already on site. The same improvements become significantly more expensive once the renovation is complete. The cost of installing an extra cable run during rough-in is small. The cost of adding the same cable later may involve opening walls, removing carpentry, and repainting finished surfaces. Install the infrastructure before it is needed. Leave room for future expansion. Provide spare pathways for technologies that do not yet exist. Most homeowners never regret spending slightly more on infrastructure during renovation. Many regret not doing so.
Plan your network before your renovation begins, not after. The decisions that matter most: where to run cable, how many points per room, conduit or not, patch panel or direct termination: are either free or very cheap to get right during construction and expensive to correct afterwards. A landed home with a properly designed wired and wireless network, a managed PoE switch, correctly terminated and labelled cables, and remote management capability will give you fewer problems, faster fault resolution, and a better experience from every connected system in the home. We have built these systems in hundreds of Singapore landed properties. The ones that were planned properly at the start are the ones we hear from least on the support line.